Notifications

9 minutes, 49 seconds
-9 Views 0 Comments 0 Likes 0 Reviews
When it comes to keeping your home energy-efficient and comfortable year-round, nothing works quite like proper insulation. But how can you tell if your current insulation is doing its job? You don’t need to be a professional to find out. With just a few basic tools and a little know-how, you can perform your own insulation inspection and get a better sense of your home’s energy efficiency.
In this guide, we'll walk you through a step-by-step DIY insulation inspection so you can identify problem areas and make informed decisions before calling in the pros like Miss Her Insulation.
Insulation inspection helps you:
Reduce energy bills
Improve indoor comfort
Prevent moisture problems
Extend your HVAC system’s lifespan
Discover early signs of insulation damage
The best part? You can conduct a basic insulation check yourself—no fancy tools or deep technical knowledge required.
Before getting started, gather the following tools and items:
Flashlight or headlamp
Measuring tape
Camera or smartphone (for documentation)
Notepad and pen
Protective gear (gloves, dust mask, safety goggles)
Ladder (for attic access)
Infrared thermometer (optional but useful)
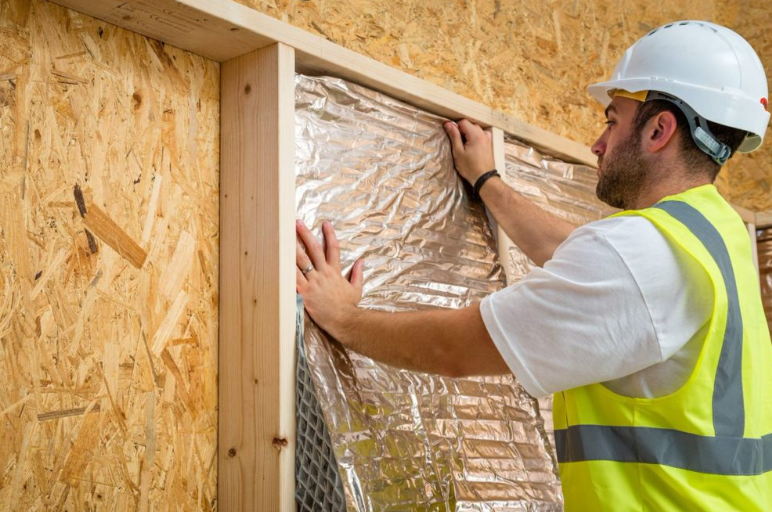
Insulation is hidden behind walls, under floors, and above ceilings. The main areas to inspect include:
Attic
Walls (especially exterior)
Basement or crawl space
Floors above unheated areas
Around windows and doors
HVAC ductwork
The attic is the easiest place to inspect insulation. It also plays a major role in heat retention and energy efficiency.
Insulation Depth: Use a measuring tape to check the depth. The U.S. Department of Energy recommends at least R-38 to R-60 (approximately 10–20 inches depending on material).
Coverage: Insulation should be evenly distributed with no gaps or compressed spots.
Moisture or Mold: Look for dark stains or musty smells, which may indicate leaks or poor ventilation.
Pest Activity: Droppings, nests, or chewed insulation could mean rodent infestations.
✅ If your attic insulation is below standard or visibly worn out, contact a professional like Miss Her Insulation to upgrade it.
You can’t see inside your walls easily, but there are some DIY methods to estimate insulation:
Turn off the power.
Remove the outlet cover on an exterior wall.
Shine a flashlight into the gap.
Look for insulation and feel its type and condition with a non-metallic probe.
Use it to detect cold or hot spots on your walls during extreme temperatures, indicating missing or poor insulation.
Poorly insulated doors and windows are some of the biggest culprits of energy loss.
Drafts: Use a candle or incense stick to detect air leaks. If the flame or smoke wavers near a closed window or door, you may have a leak.
Caulking & Weatherstripping: Check for cracks, gaps, or dried-out seals.
Frost or Condensation: Indicates a thermal inefficiency that may relate to poor insulation.
💡 Pro tip: Re-caulking or installing new weatherstripping can make a big difference, but for deeper fixes, Miss Her Insulation can help install insulation around window frames.
These areas are commonly neglected but essential for whole-home comfort and moisture control.
Insulated Rim Joists: These should have rigid foam board or spray foam.
Wall Insulation: Check for fiberglass batts or foam boards.
Moisture or Mold: Any sign of water damage must be addressed ASAP.
Floor Joists: Should be insulated if there’s living space above.
If you have floors above garages or unconditioned basements, check their underside.
Look for missing or sagging batts between joists.
Check if insulation is securely fastened with wire supports or netting.
Make sure there’s no exposure to water or pests.
Your HVAC ducts often run through unconditioned areas like attics and basements.
Feel for Leaks: Place your hand near the ductwork while the HVAC is running. Any air blowing outside the ducts is a problem.
Insulation Wrap: Ducts should be wrapped in insulation sleeves or foil-backed materials.
Discoloration: Rust or corrosion may indicate condensation from poor insulation.
Take photos and notes of areas that look damaged, thin, or questionable. This will help you:
Get accurate quotes from insulation contractors
Prioritize which areas need attention first
Track changes if you do repairs later
During your inspection, watch for these warning signs:
Visible gaps or sagging insulation
Wet, moldy, or stained materials
Pest damage (nests, droppings, gnawed insulation)
Drafts even when windows and doors are shut
High energy bills without increased usage
Uneven room temperatures
If you’ve noticed one or more of these signs, it may be time for a professional upgrade. Miss Her Insulation specializes in helping homeowners boost comfort, reduce bills, and protect their investment.
While a DIY inspection is great for identifying problems, insulation installation or major repairs should be left to professionals for:
Proper material selection
Safe removal of damaged insulation
Expert sealing and moisture control
Guaranteed energy performance
Miss Her Insulation offers free consultations and has years of experience insulating attics, crawl spaces, basements, and walls efficiently and safely.
Here’s why you should make insulation inspection part of your home maintenance routine:
Cost Savings: Identify small problems before they become expensive issues.
Increased Comfort: Maintain consistent temperatures in all rooms.
Healthier Air Quality: Prevent mold and pest-related health hazards.
Higher Resale Value: Energy-efficient homes are more attractive to buyers.
Peace of Mind: Know your home is properly sealed and protected.
Doing a DIY insulation inspection might seem like a small task, but it can reveal big insights into your home’s energy efficiency and comfort. Whether you find minor gaps or signs that it’s time for a full replacement, you’ll be better prepared to take action.
And when you're ready to take the next step, Miss Her Insulation is here to help with expert advice and premium insulation services tailored to your home's needs.
You should perform a visual inspection once a year, preferably in spring or fall. After extreme weather events, it’s also smart to check for any damage.
Yes, in many cases you can. However, the existing insulation must be dry, mold-free, and undamaged. If not, it should be removed before adding new material. Miss Her Insulation can help assess your situation.
R-value depends on your climate zone. For example, attics in colder regions typically require R-49 to R-60. A professional like Miss Her Insulation can help you determine what’s right for your home.

