Notifications

8 minutes, 40 seconds
-6 Views 0 Comments 0 Likes 0 Reviews
Introduction
Pneumatic solenoid valves are essential components in modern pneumatic systems, commonly used in industries like manufacturing, automotive, and aerospace. These China Control Valves regulate the flow of compressed air or gases, enabling automation in a wide range of applications. At the heart of a pneumatic solenoid valve is an electromagnetic solenoid, which controls whether air flows through the system. Proper wiring and maintenance of these valves are crucial for ensuring their efficiency and longevity.
This guide provides step-by-step instructions on wiring a pneumatic solenoid valve to a power source, along with tips on maintaining and cleaning the valve for optimal performance.
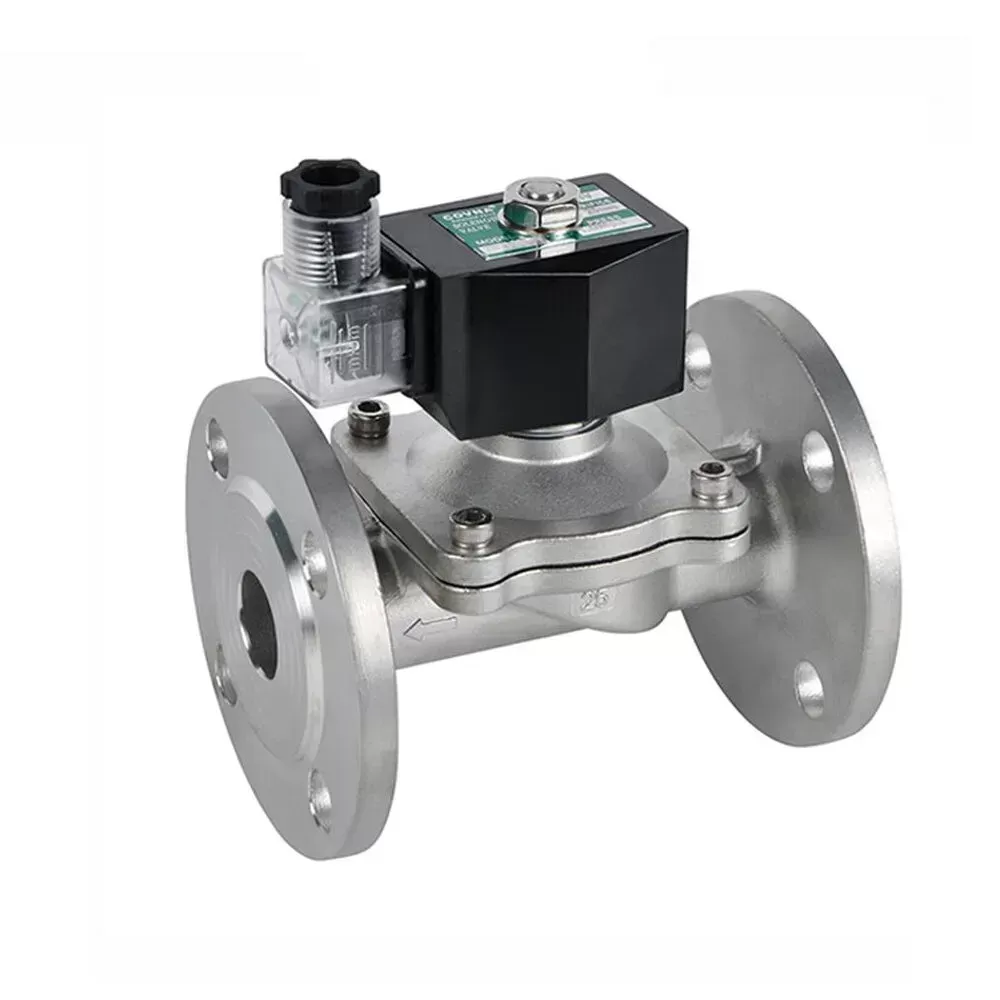
A pneumatic solenoid valve is a device that uses an electromagnetic solenoid to control the flow of air or gases within a pneumatic system. Pneumatic systems are widely used to automate various processes, making solenoid valves essential for tasks such as controlling equipment and powering machinery.
The valve operates by using an electromagnetic force generated by the solenoid coil when energized. This force moves a plunger, either opening or closing the valve and controlling the air flow. Depending on the application, pneumatic solenoid valves can vary in complexity and size, but all serve the purpose of automating air flow control.
A pneumatic solenoid valve operates with a few simple components, yet the design can be quite complex depending on the application. The main components of a solenoid valve include:
Solenoid Coil: The electromagnet that generates a magnetic field when energized, typically made of copper wire.
Plunger: A movable core within the coil that responds to the magnetic field, opening or closing the valve.
Valve Body: The outer casing housing the internal components, with ports for air to flow into and out.
Airports: The ports through which compressed air is directed into the system.
When the solenoid coil is energized, it creates a magnetic field that moves the plunger, causing the valve to either open or close, allowing the pneumatic system to operate automatically.
Correct wiring is crucial to ensure the solenoid valve functions properly. Follow these steps for proper installation:
Before beginning, ensure you have the necessary tools and materials:
Solenoid valve
Power supply (DC or AC, depending on the valve)
Wires (correct gauge)
Connectors (for the solenoid valve terminals)
Screwdriver
Wire stripper
Electrical tape (optional)
Multimeter (for testing)
There are two main types of solenoid valves:
DC Solenoid Valves: These have clearly marked positive and negative terminals. The positive wire connects to the positive terminal, and the negative wire connects to the negative terminal.
AC Solenoid Valves: These are non-polarized, meaning you can connect either wire to the live or neutral terminal. However, follow the manufacturer's instructions for proper wiring.
Use a wire stripper to remove approximately 6 mm (1/4 inch) of insulation from the ends of the wires. This ensures a clean connection and minimizes the risk of shorts.
Attach the stripped end of the positive wire to the positive terminal on the solenoid valve, and repeat for the negative wire. Ensure the connections are secure, either by using connectors or directly screwing the wires into the terminals.
For a DC power supply, connect the positive wire to the positive terminal and the negative wire to the negative terminal of the power supply. For AC systems, since the terminals are non-polarized, either terminal of the AC power source can be used. Just ensure that the system’s voltage and current requirements match.
Tighten the screws and check that the wires are securely connected. Loose connections can result in malfunctions, so ensure everything is tightly fastened. Optionally, use electrical tape to provide extra security.
Turn on the power and activate the solenoid valve. You should hear a “click” sound indicating the valve is operating. Use a multimeter to check for continuity and verify that the voltage is correct. If there are issues, double-check the wiring.
Regular maintenance helps keep your pneumatic solenoid valve functioning at its best. Follow these steps for proper cleaning and upkeep:
Disconnect the valve from the power supply before starting any maintenance work to prevent accidental activation.
Carefully remove the solenoid coil and plunger from the valve body. Keep track of the order of the components for easy reassembly.
Use a soft cloth or brush to clean any dirt or debris from the valve body. Compressed air can be used to blow out contaminants, but do so gently to avoid damaging the internal parts.
Wipe the solenoid coil with a dry cloth. Avoid using liquids or solvents, as they may damage the coil. Clean the plunger with a lint-free cloth and use a mild cleaning solution if necessary.
Check the internal parts for any signs of wear, corrosion, or damage. Replace any parts that appear damaged to ensure the valve continues to function properly.
Reassemble the valve carefully, ensuring all components are aligned and fastened securely to avoid leaks or malfunctions.
Reconnect the power supply and test the valve again to ensure it’s working smoothly. Check for any unusual sounds, leaks, or operational issues.
Wiring and maintaining a pneumatic solenoid valve is essential for ensuring that your system runs efficiently and reliably. Proper wiring ensures the valve gets the power it needs, while regular cleaning and maintenance extend its lifespan. By following the steps outlined in this guide, you can avoid malfunctions, enhance the valve's performance, and keep your pneumatic system running smoothly.
Always prioritize safety when working with electrical components, follow the manufacturer’s guidelines, and perform regular checks to ensure your solenoid valve operates as intended for years to come.Know more about Google SEO Directory

