Notifications

10 minutes, 42 seconds
-36 Views 0 Comments 0 Likes 0 Reviews
Good packaging changes how a bottle feels in the hand. It can tell a story, protect the product, and lift sales on the shelf.
This guide walks through every practical step. From structure to prints, I share tips that work in real projects.
Purpose matters. A box can tell your brand story, protect the bottle, and punch up shelf impact.
Think about who will buy the bottle and where it will sell. Retailers want neat shelving and clear labels.
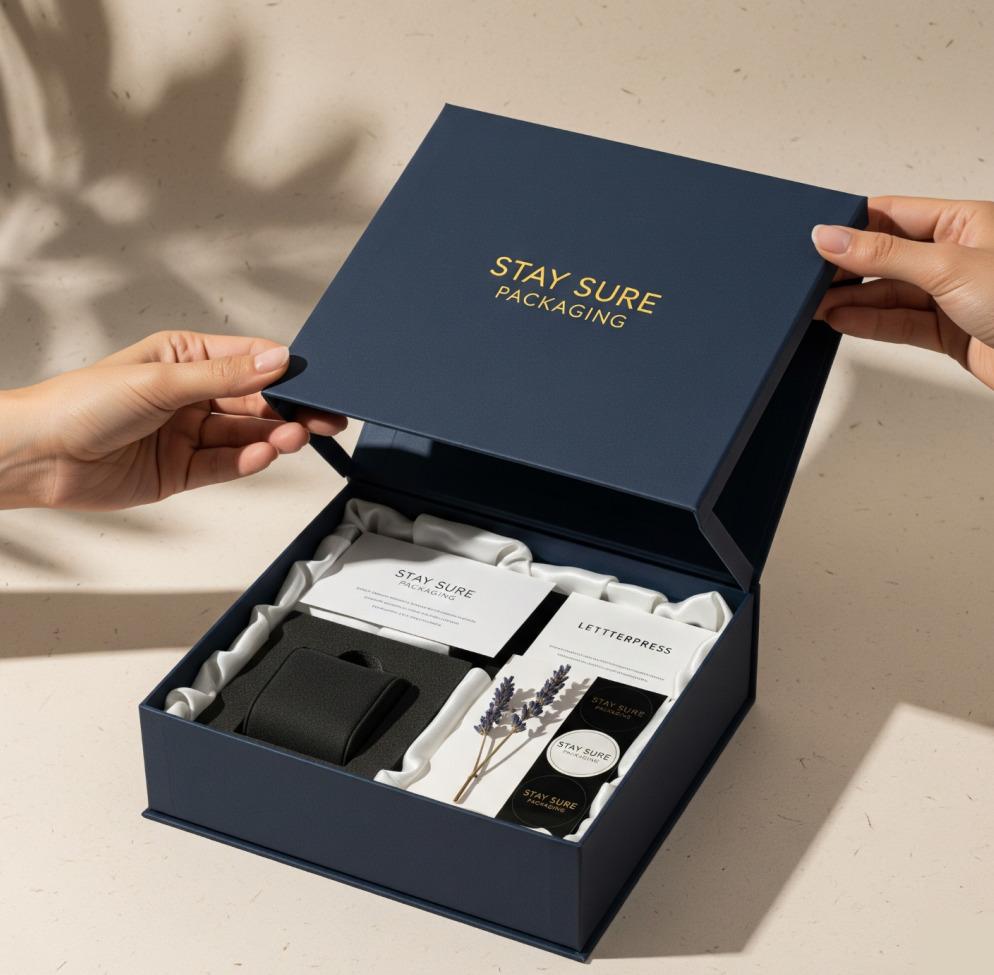
Desired outcomes include better in-store appeal, an online unboxing that creates buzz, and measurable conversion lifts. You can check vendor options like stylish custom bottle boxes to match design goals.
First impressions form fast. Packaging sets expectations before the cap is opened.
Good boxes protect against knocks, show tamper evidence, and can extend shelf life by shielding light.
Design helps a product stand out in crowded aisles. Small visual cues make big differences.
Buyers now expect greener choices. Sustainable materials can sway purchase decisions.
Start with the bottle's type and measurements. Tall bottles need different support than squat ones.
Decide how much cushioning the bottle needs. Fragile glass needs snug inserts.
Plan inserts for single bottles, gift sets, or multipacks. Each needs its own layout and support.
Align the box with your brand story. Let the packaging speak the same language as your website and labels.
Write short positioning statements for the box design. They guide copy and imagery choices.
Check regulatory rules early. Label placement, alcohol warnings, and safety info must be visible.
Choose paperboard grades by strength and printability. Thicker boards protect better.
Look for recycled content and FSC or PEFC certification when possible.
For liquids, include barrier coatings or liners to guard against seepage.
Prefer VOC-free or water-based inks for lower environmental impact.
Label end-of-life clearly so customers know how to recycle the box.
Measure bottles precisely. Allow small tolerances for manufacturing variance.
Create dielines with correct bleed, margins, and safe areas for text and logos.
Test fit with physical samples. Make sure consumers can open the box easily.
Account for multi-pack sizing and how bottles nest together.
Internal inserts can be cardboard, molded pulp, or foam. Choose by cost and feel.
Plan for shelf stability. Boxes should stand and stack without collapsing.
Add tamper-evidence features like perforated seals or foil stickers when needed.
Think about how the box opens. Smooth, intuitive openings reduce frustration.
Place the logo with clear space around it. Avoid crowding the top panel.
Set a visual hierarchy: main image or name upfront, details on the back.
Keep typography and color consistent with brand guides.
Decide between photography and illustration. Confirm licensing before printing.
Create seasonal variants for short runs or campaigns.
Match color to product category. Refreshing drinks can use cool tones.
Use contrast to keep text legible. Test under store lighting.
Choose finishes like matte, gloss, or soft-touch to change perceived value.
Add metallics, spot UV, or embossing sparingly for focal points.
Pick readable fonts. Small surfaces demand clear letterforms.
Highlight product name, flavor, and key attributes prominently.
Place regulatory copy where it’s easy to find and read.
Soft-touch coatings add tactile appeal and feel premium.
Gloss UV brings shine to accents. Foil and holographic effects catch the eye.
Embossing and debossing add depth and an upscale feel.
Die-cut windows let customers glimpse the bottle without opening the box.
Litho printing gives high detail and color consistency for large runs.
Digital printing works well for short runs and variable data.
Match colors using Pantone guides. Always request color proofs.
Plan shelf-ready packaging and test carton strength before shipping.
Factor turnaround times and minimum order quantities into schedules.
Understand cost drivers: material choice, print effects, and order size.
Select suppliers with relevant experience. Ask for reference samples.
Prototype with mockups and conduct drop and compression tests.
Plan shipping to protect finished boxes and bottles during transit.
Design the full system for recyclability. Avoid mixed materials that block recycling.
Consider reusable-pack concepts where the box has a second life.
Use clear messaging to tell customers how to dispose of or reuse the box.
Look at brands that swapped generic sleeves for branded rigid boxes. Sales often rose within weeks.
A gift-set redesign with a molded pulp insert reduced damage claims.
Lessons: test small runs, measure impact, and iterate based on feedback.
Track sales lift, unboxing social shares, and return rates.
Run A/B tests on color, copy, and finishes to find what converts best.
Collect post-purchase feedback for real user insights into packaging gaps.
Start with how you sell the bottle. For gifting, rigid or two-piece boxes work well. For retail and shipping, folding cartons with inserts often balance cost and protection.
Matte varnish with selective spot gloss offers contrast at moderate cost. It highlights focal areas without the price of full foiling.
Use mono-material solutions like coated paperboard with water-based coatings. They look good and remain recyclable. Add molded pulp inserts for protection when possible.
Digital short runs can ship in a few days to weeks. Litho with special finishes can take several weeks. Always confirm lead times with the supplier early.
Make a paper prototype or 3D-printed mockup. Do drop tests and stacking checks. Fit testing catches major issues before costly runs.
Yes, but include a clear plastic panel or an internal liner to prevent spills. Choose food-safe materials if the product interacts with the window area.
Measure sales lift, return rates, and social mentions of unboxing. Also track damage claims and retailer feedback for shelf performance.
