The Embryo Transfer Procedure - What to Expect
10 minutes, 15 seconds
-
47 Views
0 Comments
0 Likes
0 Reviews
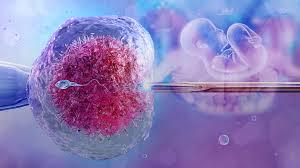
Embryo transfer represents the culmination of your entire IVF cycle, the moment when your carefully cultured embryo is placed into your uterus with hopes of implantation and pregnancy. Despite being one of the quickest and simplest procedures in the IVF process, embryo transfer often generates significant anxiety because so much depends on this single moment. Understanding exactly what happens before, during, and after transfer helps you approach this important day with calm confidence. Knowing what to expect, how to prepare, and what factors influence success empowers you to optimize conditions for your embryo's best chance at implantation.
Preparing for Your Embryo Transfer Day
Proper preparation for transfer day ensures the procedure goes smoothly and creates optimal conditions for your embryo. Your clinic provides specific instructions, but general guidelines apply to most patients regardless of whether you're having a fresh or frozen embryo transfer.
Pre-Transfer Preparations:
- Continue all prescribed medications exactly as directed
- Drink water to maintain moderately full bladder (aids ultrasound visualization)
- Eat a light meal beforehand (procedure doesn't require fasting)
- Avoid perfumes, scented lotions, and strong fragrances
- Wear comfortable, loose clothing for easy changing
- Arrive on time to reduce stress and rushing
- Bring partner or support person if desired
Bladder Fullness:
- Full bladder straightens the uterus for easier catheter passage
- Allows clear ultrasound visualization of uterine cavity
- Don't overfill (causes discomfort and may require partial emptying)
- Start drinking water 1-2 hours before appointment
- Clinic staff will assess and adjust as needed
Some clinics prescribe Valium or similar medication before transfer to help you relax and reduce uterine contractions. If offered, consider accepting as studies suggest reduced contractions may improve implantation rates.
The Day of Transfer: Step by Step
Understanding exactly what happens during your transfer appointment reduces anxiety and helps you know what to expect at each stage.
Arrival and Preparation:
- Check in and complete any required paperwork
- Change into gown or remove clothing from waist down
- Meet with embryologist who confirms embryo details
- Review embryo quality and discuss which embryo(s) being transferred
- Sign consent forms if not completed previously
Embryo Confirmation:
- Embryologist shows you image of your embryo on screen
- Confirms your identity (multiple verification steps for safety)
- Explains embryo grade and quality
- Discusses any remaining embryos being frozen
When working with an experienced IVF center in Jaipur, your team takes time to answer questions and ensure you feel comfortable before proceeding with the transfer.
The Transfer Procedure Itself
The actual embryo transfer takes only 5-10 minutes and causes minimal discomfort for most patients. The procedure resembles a pap smear more than a surgical intervention.
During the Procedure:
- You lie on examination table with feet in stirrups
- Speculum inserted to visualize cervix (similar to pap smear)
- Cervix gently cleaned with sterile solution
- Abdominal ultrasound transducer placed on belly for guidance
- Thin, soft catheter inserted through cervix into uterus
- Embryologist loads embryo into transfer catheter
- Catheter advanced to optimal position in uterine cavity
- Embryo gently deposited with tiny amount of culture medium
- Catheter slowly withdrawn
- Embryologist confirms embryo left catheter successfully
What You'll Feel:
- Pressure from speculum (mild discomfort)
- Full bladder sensation
- Slight cramping when catheter passes through cervix
- Most patients describe it as painless or mildly uncomfortable
- Procedure completed before you know it
Ultrasound Guidance:
- You can watch the screen during transfer
- Small flash visible as embryo and fluid are released
- Confirms correct placement in uterine cavity
- Provides reassurance that transfer was successful
Factors Affecting Transfer Success
Several technical and biological factors influence whether your embryo successfully implants after transfer.
Embryo Quality:
- Higher grade embryos have better implantation rates
- Blastocyst (day 5/6) transfers typically more successful than day 3
- PGT-A tested normal embryos yield highest success rates
- Even lower grade embryos can result in healthy pregnancies
Endometrial Receptivity:
- Optimal lining thickness (8mm or greater ideal)
- Proper hormonal environment (adequate progesterone)
- Correct timing within implantation window
- Absence of polyps, fibroids, or inflammation
Transfer Technique:
- Experienced physician performing procedure
- Smooth, atraumatic catheter passage
- Proper embryo placement in mid-cavity
- No blood or mucus on catheter tip
Patient Factors:
- Relaxation during procedure (reduces uterine contractions)
- Full bladder for optimal visualization
- Following pre-transfer instructions carefully
An experienced IVF hospital in Jaipur ensures skilled physicians perform transfers using ultrasound guidance and optimal techniques to maximize your success probability.
Immediately After Transfer
Following the transfer, you'll rest briefly before being discharged home with instructions for the coming days and weeks.
Recovery Room:
- Rest 10-30 minutes (varies by clinic protocol)
- Empty your bladder (finally!)
- Receive post-transfer instructions
- Schedule pregnancy test appointment
- Ask any remaining questions
Going Home:
- Someone should drive you home (especially if Valium given)
- Rest of the day: Relaxation recommended but not strict bed rest
- Normal activities can resume next day
- No heavy lifting, strenuous exercise, or hot baths
Post-Transfer Guidelines and Restrictions
What you do after transfer matters, though probably less than many patients believe. Research shows strict bed rest doesn't improve outcomes and may actually be counterproductive.
Recommended Activities:
- Light walking and normal daily activities
- Gentle stretching or restorative yoga
- Work (desk jobs) can resume next day
- Light household tasks
- Relaxing hobbies and entertainment
Activities to Avoid:
- Heavy lifting (over 10 kilograms)
- High-impact exercise or strenuous workouts
- Hot baths, saunas, or hot tubs
- Swimming (infection risk for some clinics)
- Sexual intercourse (clinic policies vary)
- Excessive caffeine or any alcohol
Medications:
- Continue progesterone exactly as prescribed (critical!)
- Take all other medications on schedule
- Never stop medications without doctor approval
- Progesterone supports lining until placenta takes over
After transfer, you enter the notorious two-week wait before your pregnancy test. This period tests emotional resilience as you analyze every sensation wondering if it indicates success or failure.
What's Happening Inside:
- Days 1-2: Embryo continues developing and begins hatching
- Days 3-4: Embryo attaches to uterine lining
- Days 5-7: Implantation occurs, embryo burrows into endometrium
- Days 8-10: HCG production begins if implantation successful
- Days 10-14: HCG rises to detectable levels
Managing the Wait:
- Stay busy with enjoyable activities
- Limit symptom searching online
- Avoid home pregnancy tests before official test date
- Connect with supportive friends or support groups
- Practice stress-reduction techniques
- Remember that symptoms (or lack thereof) don't predict outcome
Most post-transfer experiences are normal, but certain symptoms warrant contacting your medical team promptly.
Contact Your Clinic If:
- Heavy vaginal bleeding (soaking a pad)
- Severe abdominal pain or cramping
- Fever over 38°C (100.4°F)
- Signs of infection (foul discharge, chills)
- Severe bloating or difficulty breathing (OHSS signs)
- Questions about medications
Normal Experiences (Don't Worry):
- Light spotting or brown discharge
- Mild cramping similar to menstrual cramps
- Bloating and breast tenderness
- Fatigue and mood changes
- No symptoms at all
Embryo transfer is a brief but pivotal moment in your IVF journey. While the procedure itself takes only minutes and causes minimal discomfort, its significance generates understandable anxiety. Preparing properly, understanding what to expect, and following post-transfer guidelines creates optimal conditions for your embryo's implantation. Remember that once transfer is complete, you've done everything possible. The rest depends on biology, and no amount of bed rest, positive thinking, or worry will change the outcome.
Trust your medical team, follow your medication protocol precisely, take reasonable care of yourself without excessive restriction, and maintain hope during the waiting period ahead. Whether this transfer succeeds or you need additional attempts, understanding the process helps you navigate each step with knowledge and confidence.
Embryo Transfer Procedure


